in color and in black and white


One of the big takeaways from my recent sweater sampler experiment was an apparently dormant interest in colorwork knitting. Which in turn inspired me to sign up for Aroha Knits' Colorwork Catalyst Workshop.

I’m about halfway through the swatch featuring the second of three techniques covered in the self-guided course (see here) and will be returning to this topic when I complete all of them. In the meantime, I decided to seek out some additional multi-color inspiration / eye candy via one of my favorite resources, my stash of vintage magazines, and thought I’d share some of what I found here.


(The irony in looking for colorwork inspiration in vintage magazines being the majority of these publications, particularly ones in the knitting category, only feature full color printing on the covers; meaning 95% of the photos are rendered in black and white. But we makers are a creative bunch, right? We can look at these images and conjure up multiple color combinations in our mind’s eye to our heart’s content. At least that’s what I assume publishers told themselves at the time, so that’s what we’re going with now.)


As you can see, I’m currently a bit obsessed with fitted pullover sweaters featuring novelty print motifs, which I blame on the fact I’ve recently acquired the most perfect pair of high waisted, wide leg 1970s style jeans and need some tiny tops to balance out all that volume. I’m also on the lookout for some tank patterns, which is another topic for another blog post.


Full disclosure: The last two images were not found in the dusty confines of one of my tattered magazines but are too inspirational to be left out. (I think I found them on Tumblr at some point, then they made their way into the folder on my desktop where I keep pictures of random photos of sweaters I like; and no, I am not ashamed of the fact I have such a thing.)

sampling the sweater sampler; part four, the big finish…


Happy Monday everyone! Sorry I left you hanging for a minute there. I had all intentions of posting the fourth and final entry in this series at the end of last week but Mother Nature had other plans. (AKA when you’re self employed and it’s 75 degrees and sunny on a Friday afternoon in February on the East Coast who can resist starting the weekend early?)

Anywhoo, to get back on topic, at the end of part three I had to put the sampler down for a bit. Literally, as it was time to knit an I-Cord to thread through the lacing round and a belt for the sweatshirt pocket, but also metaphorically because I ran out of the contrasting yarn needed to complete the cord and pocket and had to hunt down some bits of black worsted weight yarn leftover from an earlier knitting experiment. Not so surprisingly, it didn’t take long. So let’s get back to business.

The Knitted Belt: I’m guessing there are as many styles of knitted belts as there are non-knitted belts, but for the sampler you basically knit an I-Cord with extra stitches (and slip the extra stitches, purlwise) thus creating a firmer, wider, flatter, double sided I-Cord, if that makes any sense. And if it doesn’t, you should just try it for yourself. (PS: Does a kangaroo pocket actually need a belt? No. It does not. Conversely, does a sweater sampler benefit from having a belt as part of the exercise? Probably. And where else are you going to attach it? We will leave it at that.)


And, believe it or not, we have reached the bind off! Or, rather, bind offs; because we’re about to explore several. But first, another side note: as mentioned in a previous entry, the pattern calls for a set of double pointed needles in the same size as the circular needle, in this case size 7, which I do not have on hand. (And didn’t realize I needed until I was well into it.) Up until this point I used size 6 needles to complete these bits but decided to go with size 8 for the cast-off, mainly because I’m used to going up a needle size to bind off from previous sweater experiments. In retrospect, not my best idea, but it is what it is.

The Knitted Cord Cast-Off: As the name would imply, this cast-off mimics the look of a knitted cord grafted onto the edge. Which does make for a tidy, rounded edge. But it looks weird to me. Maybe it’s the fact it’s knit in a different color that’s throwing me off? Or the larger needle size? Either way, it’s a pretty simple technique; if you can make a knitted cord, you can do a knitted cord cast-off.

The Knitted Loop: This little extra certainly popped up in my life at the right time, as I was just trying to figure out how to add a loop to a potholder I’m knitting. My plan was to bind off as normal, pick up a few stitches in the bind off row near the corner, knit a small I-Cord using said picked up stitches and sew the end of the cord to the beginning to form a loop. This technique has you knitting the cord and attaching the loop as part of the bind off row itself. Which is kind of genius. I think I’ll try both out on my other project and see which looks better.

Lace Cast-Off: An interesting cast-off; which is more like a fancy edging since you create a whole new lace panel as you bind off the stitches. I have to admit, this looks weird to me too. Again, perhaps going up a needle size was not the best choice. Perhaps it would look better after blocking. Don’t know if I ever will block this, or bind off this way again, so the jury is out on the lace cast-off for now.

Cast Off In Ribbing: Now this is a bind off I can get behind. Like I said in our first entry, you really can’t go wrong with 2 x 2 ribbing; it looks good and is stretchy in all the right ways. So it’s not surprising the ribbed bind off adds a good looking, stretchy edge. Therefore I will amend my previous statement to say you really can’t go wrong with a 2 x 2 rib or a 2 x 2 ribbed cast-off.

The Initialed Hem: Yay, more colorwork. (I realize this reads as sarcasm but I’m actually getting into this whole two color knitting thing.) My stitches are still a little wonky but I feel like I’m getting better at it each time, which is certainly encouraging. I realized I made a couple of rookie mistakes in this segment: I forgot to slip the first stitch of every row and twist the yarns in order to carry both colors neatly up the side. But I’m still pretty pleased with myself. Unintentional bonus points: I even had the husband teach me how to use Excel to make a little blank grid to chart my initials.


(For the record, the grid being upside down is not a mistake. You’re supposed knit the letters this way as the panel then gets folded over and sewn to the inside. Also, I wanted to go the extra mile and chart it on the computer, with neat even dots and little numbers on the axis, but the program is on his computer and I’d already interrupted his work day enough so hand drawn dots it was / is.)

At this point all of the stitches are cast off but we’ve got one more step to go... 

The Afterthought Pocket: As the name would imply, this type of pocket can’t be attached until after a sweater is complete. And I’m not going to lie to you, I briefly considered skipping this part because I was petrified of the first two steps - cutting one leg of the center stitch and picking yarn out of 5 ½ stitches to the left and the right. (Um, there’s a half stitch now?) Fortunately, I was able to talk myself out of talking myself out of knitting the pocket and I’m so glad I did. Do you have any idea how many of my sweaters, handmade or otherwise, need pockets? The obvious answer being any and all of the ones that don’t already have one. However, since the non-handmade sweaters don’t come with leftover yarn to make pockets, we’ll stick to the ones I’ve knit.

And that, my friends, is how you knit a sweater sampler! Overall I’m really glad I decided to embark on this little journey. I got to practice some stuff I already knew, learned some new techniques and tried a whole bunch of things I wouldn’t have otherwise tried. (Some of which I’m itching to explore more.) I definitely feel like it boosted my knitting swagger / confidence, which alone makes it a worthwhile effort.


The only negative thing I would add is, I’m not a hundred percent pleased with the photos in this series. Photography is not my strongest suit (and the lighting in my house this time of year doesn’t help) but, much like colorwork and knitting Continental, I’m hoping to get better results the more I do it.

Thanks so much for following along! If you have any sweater knitting (or photo taking) tips or tricks you’d care to share, I'd love to hear them!

sampling the sweater sampler; part three: getting fancy


Keeping on keeping on with our sweater sampler experimentation, when we left off we were about to decrease the stitches added during the bar increase section, so let’s get to it. (PS: For those who don’t feel like scrolling down here are links to part one and part two.)

Raglan Seamline Decreases: This is essentially the opposite exercise of the increases, seeing how changing the spacing - and in once case the placement - between K2TOG & SSK decreases changes the look of the “seams.” I think I’ve used all of these combinations at one point or another so it wasn’t particularly challenging but it is interesting to compare them side by side, so to speak.

Two Color Knitting: OK, now this part was challenging! Just FYI, I am an “English” knitter; also known, I believe, as a thrower in some circles. Meaning I hold the yarn in my right hand and “throw” it around the left to make a stitch. The other option is “Continental” knitting, aka picking, where you hold the yarn in you left hand and “pick it up” with the right needle to make a stitch. This two color knitting scenario has you knitting English style with your main color in your right hand and Continental with an alternate color in your left hand; alternating every other stitch. Which is both confusing and difficult at first. After that, it’s just difficult. (Haha!)

Seriously though, I think it was the doing them at the same thing - more so than knitting left handed - that was giving me the most trouble because, just for kicks, I decided to do the second round of stockinette stitch that followed Continental style and felt like I got the hang of it fairly quickly. (Although as I’ve spent most of my life living and working with left handed men, I have developed some distinct Southpaw-ish tendencies.) It does seem rather efficient. I may have to revisit this, and figure out how you purl Continental style, in the future.

Weaving - Knit Stitches: This is another two color knitting technique, where you create a pattern using a series of light and dark colored stitches and kind of weave the second color in as you go. It too requires the whole different colored yarn in each hand thing, which got slightly easier the more I did it. But only slightly. My main mistake in this portion was attempting to read the written instructions instead of following the chart.

A recent foray into test knitting (a subject for a future post) taught me I should go with the charted instructions when they’re an option but I got so focused on tying to keep the light yarn in the left hand and the dark yarn in the right hand, I forgot that lesson. Another thing I leaned during the test knit, that was further reinforced by this section, I tend to knit very tightly when going into unfamiliar territory. I need to work on that / keep it mind when trying new techniques.


Swiss Darning: Also known as duplicate stitch - a much more literal term since basically you’re creating a new stitch on top of an existing stitch with another piece of yarn and, in this case, a third color. I became familiar with this technique a couple months ago when I knit a pair of kitty socks for my niece. It’s a bit of a slow go but another one of those things that becomes easier with practice.

At this point I feel like I should point out this sampler now contains the most colorwork I’ve done to date and, I must admit, I kind of liked the challenge. I’m feeling like there might be more of this in my future as well. Maybe in the form of a hat or something? (Another subject for a future post.)

The Knitted Cord: (AKA the I-Cord) I ran out of black yarn during the weaving portion so I decided to move on and complete this later. Since I’ve done it several times before I’m not sure I’ll have much commentary but if I do, I will add it in.

Lacing Round: A simple combination of YO / K2TOG stitches, basically meant to be paired with the knitted cord to cinch a waistline, cuff, top of a pouch, etc. As the author points out though, there’s no need to limit yourself to yarn; you can weave pretty much anything you fancy in those YO spaces. But since we’re fully playing along, we will use the knitted cord.

And since the next two steps, knitting a belt to go through the sweatshirt pocket and trying a number of different bind offs, require more of the contrasting color I will cut this off here and go stash diving in my ziplock bag of random yarn bits to find more black worsted weight yarn.

when life gives you raffia, you start researching how to make a coiled basket


My original plan for today’s post was to share the progress I’d made on the sweater sampler over the weekend. Unfortunately / fortunately it was gloriously warm and sunny both days and I spent very little time knitting. Which means very little progress was made; which, in turn, makes for a pretty boring update.

So it’s a good thing I let this giant bundle of “forget me not” raffia, in the perfect shade of teal, follow me home from the flea market yesterday. (PS: Maybe 12 ounces is the normal amount contained in a bundle of raffia? I must admit, I’m new to this medium. Either way it was a dollar well spent.)

(PPS: It's a bit hard to get the scale in this pic but you can see it next to a skein of yarn in my IG feed.)


Anywhoo, my first thought when I saw it was “I wonder if I can use this to crochet a basket?” According to my brief internet search this morning, the answer is most definitely yes. Although you don’t really crochet the basket so much as you use some similar techniques in weaving a basket? After I actually make one, I will let you know.  

I think I’m gonna start with this video (I tend to appreciate things hailing from Australia, particularly rock bands, and trust Craft School Oz will not steer me wrong) but I definitely want to try this tutorial from We Are Scout as well.

Have you ever tried basket weaving? I’d love it if you’d share your experiences and / or tips in the comments.

sampling the sweater sampler; part two: both sides now


In case you missed the previous post, and my header doesn’t make it obvious enough, one of my current works-in-progress is a sweater sampler. (As seen in, and on the cover of, Jaqueline Fee’s The Sweater Workshop.) When we last had a peek at our progress, I’d gotten through the ribbed section and was ready to move on to short rows; so let’s do. But first a couple of quick side notes.

I neglected to mention how much I enjoyed and appreciated the illustrations in this book, courtesy Patricia LaLiberte. (An example of which can be seen at the top of this post.) No offense to people who draw pictures of sheep knitting from their own wool and the like, but I prefer my knitting illustrations to be cute and useful, and Patricia’s are definitely both.

I also realize I neglected to post the scan of the back side of the sampler in our previous entry – and we’ve reached the point where different things are starting to happen on each side - so I’ve added that below.


And now, back to sampling the sampler…

Short Rows: This was another addition I don’t quite understand the purpose of. I use short rows all the time - when knitting socks for the husband, shaping a shawl, etc. – and they certainly serve a purpose in those garments but it’s unclear to me why someone would want the back of their pullover to be a few rows longer than the front. On the other hand, I prefer a cardigan so what do I know.

Cardigan Border With Chain Selvedge And Buttonholes: Again with the cable cast on. Sigh… (See part 1 for the origin of the sigh.) Thus far the majority of my sweater knitting adventures have been top down cardigans, which normally require picking up stitches along the edge for your border so this is a good technique for me to have in my bag of tricks. Still not loving the 1x1 ribbing but I do like the chain selvedge. (It’s a bit hard to see all of this in the photo below, and my efforts to get a close up shot were unsuccessful, but if I can get a better shot I will add it in.)


Sweatshirt Pocket: AKA the point where we officially move into unchartered territory. (Officially.) Or so I thought. In retrospect, I already knew how to pick up stitches many rows down thanks to Veera Valimaki’s Pop Block pattern (for the record, since you move towards the left side as you go, I like to pick up the right side leg of the stitch) and from there it was a simple matter of knitting back and forth as many rows as you need to get to the height of the round on the original needle(s) and joining the pocket to the “sweater” with a three needle bind off. Easy peasy indeed! Not sure how many times I will need to knit a kangaroo pocket in the future but I’m glad I tried it once.

(Another side note: In addition to the other things I didn’t have on hand for this project, apparently I don’t have a set of size 7 double pointed needles. I had a set of size 6 and size 8 to choose from, elected to go with the former since it’s only a .25mm difference and it worked out fine.)

The Bar Increase: Just in case, like me, you thought a bar increase and a lifted increase were the same thing, they are not. The bar increase is the same as a KFB, aka knit thought the front and back of the same stitch. Personally, I prefer the look of a lifted increase. (Plus, when I first made an attempt to master it, it took what felt like forever to get the hang of it so I think I feel compelled to do it that way when I need to add stitches.) But I followed the pattern as written so I could see what the thee different sets of paired KFB increases would look like in case I want to substitute in a future project.

Stripes; Knit, Purl and Raised: Nothing much to say about a knit or purl stripe. The raised stripe was new to me though. Much like the pocket situation, I’m not sure I will be using this decorative accent much but it was cool to have an excuse to try it out.


At this point it’s time to decrease the stitches we increased in the previous portion of the sampler and, as of the photos seen above, I’ve just completed the set up row which means it’s time to push the euphemistic pause button on this topic.

Speaking of the photos, I should also point out this thing is becoming a bit of a beast; currently clocking in just shy of 16” long and inching ever closer to outgrowing the spot on the floor in my office where I like to take pictures of my knitting. So I may have to forgo continuity for the sake of better pictures in parts three and four.

Anywhoo, hope you have a great weekend! See you back here Monday.

sampling the sweater sampler; part one: the basics


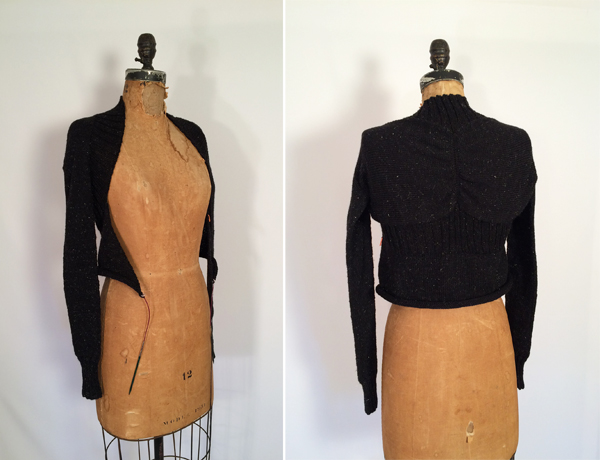
A couple of years ago, I picked up a copy of Jacqueline Fee’s The Sweater Workshop at a local library sale. I’m always looking to learn new sweater knitting techniques (and new knitting techniques in general) plus the sampler pictured on the cover looked like it would be fun to try.

Last year, Thanksgiving weekend to be more exact, my project basket was experiencing a bit of a lull (aka waiting for the yarn to complete my holiday gift knitting to arrive) so I decided to cast on said sampler and got about 9 inches in before it started it’s slow descent to the bottom of the basket. Where, I am not pleased to report, it has languished ever since.

Fortunately this blog gives me an excuse to knit and write about any random thing - and I must admit, although I am enjoying the process so far and look forward to getting to the part where I learn new skills - this is a petty random thing to knit. Which means it is the perfect time finish this off!

Although I didn’t have the forethought to take pictures of my progress as I went, I did jot down some notes / thoughts on each small section as I completed them. (See, I told you this blog was destined to be.) So I figured I would share those now and try to do a better job with the photo aspect of documenting this experiment moving forward.

A couple of random side notes: for the record, the author recommends a light color worsted weight yarn but I wanted to use something I had on hand (and I’m not much of a light color person) so I went with some Knit Picks Wool Of The Andes that I’ve had in my stash forever and never used; because I’m also not much of a bright color person. And this color is SO. EFFING. BIGHT. (Haha! Such are the pitfalls of shopping on the internet.) I didn’t have the recommended 16” circular needle either so I elected to go with the magic loop method. And now, on to the knitting…


Cable Cast On: I’m kind of confused about this cast on – for this purpose and in general - because the You Tube tutorial I watched said this technique “creates a fairly stiff, non-stretchy beginning” whereas the book recommends this particular cast on for bottom up sweaters because of it’s elasticity. Either way, this was my fist time trying it and, so far, I’m not a fan. It’s super fiddly and takes a lot longer than a long tail cast on. (Although that may have something to do with this being my fist attempt.) On the bight side, it does look nice and since you don’t have to figure out how much yarn you need to cast on there’s no waste.

Garter Stitch: What is there to say about good ol’ garter stitch? Except I think it looks weird as a border for a sweater. I’m more of a ribbed border kind of girl.

Stockinette Stitch: Repeat the fist sentence of the last paragraph, swapping stitch names. Honestly I didn’t need to practice either of these but figured, hey - if I’m gonna do this, I should do it. Know what I mean? I did skip breaking and reconnecting yarn though because it just seemed unnecessary.

K1, P1 Ribbing: I’ve always felt my knit stitches looked sloppy in k1,p1 ribbing; this sampler didn’t change that.

Twisted Rib: For some reason, I’ve never tried this stitch; it definitely looks better than the 1x1 ribbing but it takes a minute (or two) to get the rhythm of it.

K2, P2 Ribbing: Still kind of sloppy but better; if I had to chose I’d probably go with 3 x1 rib as my favorite but you really can’t go wrong with K2, P2 rib.

Stripe In Ribbing: I’ve never heard of this technique so I figured I would share it. On the round you want to change colors, instead of continuing in the ribbing, you knit every stitch thus creating a nice smooth transition between colors. The change in stitches kind of disappears into the ribbing and all of the bi-color bits you can see on purl stitches are hidden in tidy rows on the flipside. (And look cute in case you wanna make that side the outside.) It’s kind of genius actually. Try it out sometime.


The next step is to add a little extra length to one side using shot rows which, at the time, made it seem like as good of a time as any to set it aside for a week or two in order to tackle the aforementioned holiday knitting. And it would have been, except for the whole not having touched it since Thanksgiving and tomorrow being Valentine’s Day part. On the flipside, in retrospect I set myself up for a perfect break point for this multi-part post so let’s assume that was meant to be as well.

Anywhoo, I’m gonna get stitching and will report back when more progress has been made.

wip wednesday: 11.25.15


‘Tis the night before Thanksgiving… which, this year, means the husband is making a delicious smelling culinary mess all over the first floor of my house and no other creatures are stirring because, for a change, we’re preparing dinner here but eating it at my sister’s house. And I bring all that up because this non-traditional take on our traditional family dinner has left me with a relatively free evening.

One I considered spending working on what I have come to refer to as my “Thanksgiving sweater.” Not because of the time of year; rather, my goal was to wear it for the first time on the holiday. Unfortunately, even if I worked on it all night it’s unlikely I will have it finished and blocked in less than 24 hours so I decided to write about knitting the sweater instead. With that in mind, since it’s a Wednesday and I’m posting about my current work in progress, I felt like this was as good a time as any to dust off another Jade Pussycat tradition, WIP Wednesday.

WIP Wed. was one of the first recurring features on the original (long since deleted) JP blog. The idea behind it is pretty simple, if not self-explanatory: each week I would I snap a couple pictures of, and share some thoughts about, whatever project was currently on my needles.

Only time will tell as to whether or not this winds up being a weekly or bi-weekly feature again. (Technically I was only going to blog for the month of November so who knows. This might wind up being the only WIP Wed. post period.) Similarly only time will ultimately tell how much I like this sweater.


As of now I’m feeling pretty good about it. (And this blog, but one topic at a time.) I think I mentioned at some point that I’ve been knitting my way through Hannah Fettig’s Knitbot Essentials book. So far I’ve made two Breezy cardigans, two Featherweights and one Effortless (the latter is essentially a heavier weight combo version of the first two) and am happy to report over the past few weeks I have officially transitioned from a woman who makes handmade sweaters to one who wears her handmade sweaters. All the time!

In my defense, I knit the heavier weight one during our warmer than normal Spring season, the Featherweights over the Summer and then spent most of October in South Florida so, although my sweater knitting obsession is a month or so shy of the one year mark, I had a good eight month stretch of non-sweater weather in my life. But, as usual, I digress.


This time I decided to try out the Wispy pattern and make some modifications. Specifically I knit the sleeves in the round two at a time (basically knitting the sleeves for the Featherweight cardigan in reverse), switched to flat stockinette for the back panels and joined the two sides together using a three needle bind off. (This combined with Hannah’s decrease makes the seamed gather in the center, aka my favorite part.)

From there I’ve pretty much followed the pattern as written, although I did add a couple extra short rows in between the ribbing and body, in hopes of avoiding visible side boob. (Which I have nothing against; but there’s a time and place for everything and in my world sweater weather and side boob do not go together like love and marriage nor anything else that rhymes with horse and carriage.)

Hopefully I can get this finished in time to be my day after Black Friday, aka Saturday, sweater because according to recent text messages from my sister, niece and mother I’m way behind on my Christmas / Chanukah gift knitting.

Happy Thanksgiving to those who celebrate the holiday and happy Wednesday / Thursday to everyone else!